The new lamp has been bought and should of course be used as soon as possible. In six easy steps, we show you how to install the new lamp correctly and safely:
1. Turn off the Power
Before you start installing a new lamp, it is essential to shut off the power to the room to avoid the risk of a life-threatening electric shock. It is not enough to switch off the light switch in the room in question! The safest way is to turn off the switch for the main circuit in the fuse box.
2. Test with a Voltage Tester
Then you can use a voltage tester to test whether there really is no more current flowing. To do this, simply press the button on the end of the voltage tester (available for about two pounds at any hardware store) while holding it directly against the cables coming out of the ceiling. If the light of the voltage tester lights up red, current is still flowing through the cable - you have therefore turned off the wrong fuse. Try again to shut off the correct fuse and test again with the voltage tester.
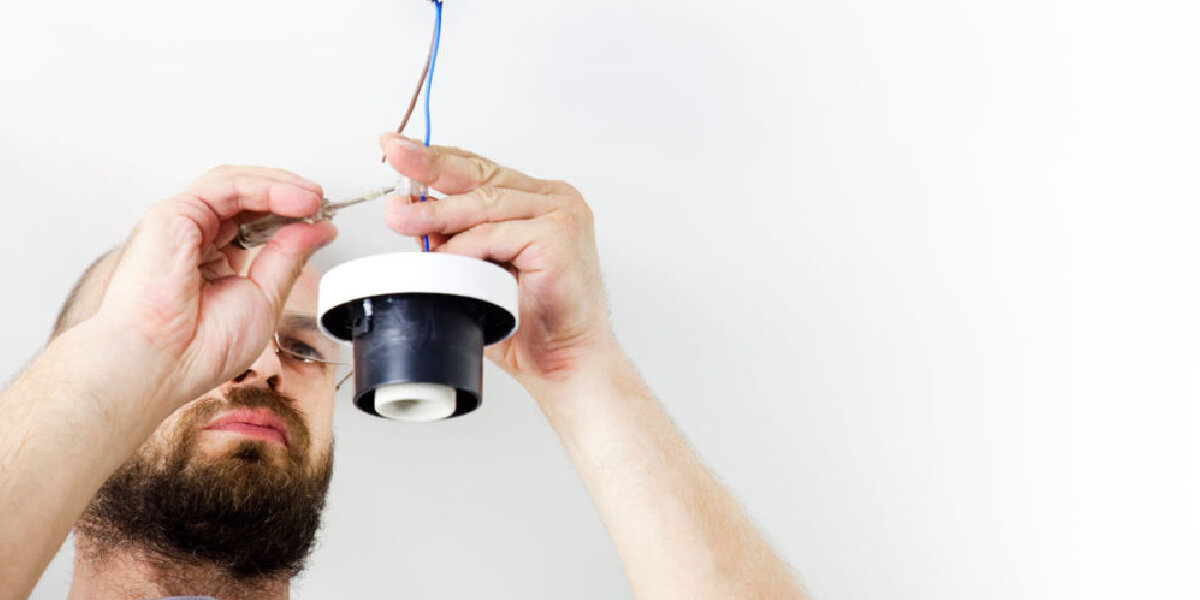
3. Attaching the wire terminal or connectors
By attaching a lustre terminal, you can connect the cables of the lamp you want to mount with those from the ceiling. Usually, lustre terminals or wire connectors are already attached to the ceiling cables, but you can also buy them very cheaply at a hardware or electrical store. If a lustre terminal has not yet been fitted, it is easy to install one: To do this, simply loosen the screws of the lustre terminal so far that the ceiling cables fit through it. When you have pulled the cables through the lustre terminal, tighten the screws again.
4. What colour cable does what?
You will see that there are three cables hanging from the ceiling: One is the protective conductor (PE) or earth, usually green-yellow or more rarely red. The brown or black cable is the live wire (L) and conducts the current to the lamp. The neutral wire (N), either grey or blue, conducts the current away from the lamp. If you live in an older house, you may only find the protective conductor and the phase.
5. Connect the cables
Now it's time to connect the lamp: each wire must be connected to the cable of the appropriate colour. You start with the yellow-green earth cable. Then connect the grey/blue neutral wire and finally the black/brown live to the lustre terminal. If you find only two cables, connect the green/yellow ground first and then the live, because the neutral conductor is missing.
6. Fastening the lamp
If you have a lamp with a cable cover, you should try to hide the wires in it as best you can while pulling the cable cover up towards the ceiling. A ceiling spotlight, on the other hand, must be screwed firmly to the ceiling. Finally, switch the fuse on again.